Why Is Solder Not Sticking?

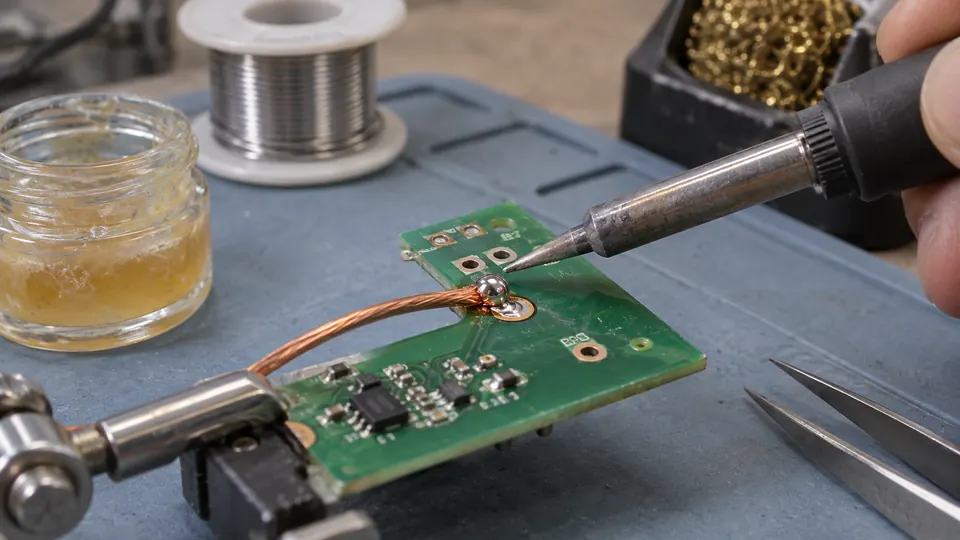
Solder that refuses to stick is usually failing to wet the surface. The most common reasons are oxidation, contamination, inadequate flux, poor heat transfer, or a material that ordinary electronics solder cannot readily wet. Start by observing where the solder fails. That distinction often identifies the problem faster than raising the iron temperature.
If solder melts on the tip but forms a bead on the connection, the workpiece may be dirty, oxidized, or insufficiently heated. If solder will not coat the tip, the tip surface may be oxidized or damaged. If one side of a joint accepts solder while the other rejects it, focus on the part that remains unwetted.
What Solder Should Do
Molten solder should spread across compatible, clean metal and form a bonded interface. It should flow onto both surfaces in a joint rather than sit as a rounded blob. This spreading action is called wetting.
Solder is more likely to wet a surface when:
- The base metal is solderable with the chosen alloy and flux.
- Oxides, grease, coatings, and other contaminants have been removed.
- Flux is active while the solder is molten.
- The joint surfaces reach a suitable working temperature.
- The iron tip is clean, tinned, and making effective thermal contact.
Pressure cannot force solder to wet an unsuitable or unprepared surface. Prolonged heating may burn flux, damage insulation, loosen PCB pads, and oxidize the work further.
Diagnose the Symptom First
| What you observe | Likely possibilities | What to check next |
|---|---|---|
| The solder wire does not melt against the tip | The iron is not hot, the tip has poor heater contact, or the tool cannot maintain heat | Confirm the station is operating, the tip is installed correctly, and the tip is appropriate for the iron |
| Solder melts on the tip but beads up on the joint | The joint is cold, oxidized, contaminated, or short of active flux | Clean the surfaces, add compatible flux, and improve contact between the tip and joint |
| Solder will not coat the iron tip | The tip is oxidized, contaminated, worn through, or improperly seated | Clean and retin the tip using nonabrasive methods; replace it if the plating is damaged |
| Solder wets the PCB pad but not the component lead | The lead may be oxidized, coated, contaminated, or made from a difficult material | Inspect and clean the lead, then verify that its finish is solderable |
| Solder wets the lead but pulls away from the pad | The pad may be contaminated, oxidized, damaged, or covered by solder mask | Inspect under magnification and stop heating if the pad is lifting or separating |
| Solder sticks in some places but retracts from others | Localized grease, corrosion, coating, or uneven heating may be present | Clean the affected area and heat both parts of the joint more evenly |
Check the Iron Tip
A soldering iron transfers heat through the small area where its tip touches the work. A blackened or dry tip may be hot while transferring heat poorly. Molten solder on a properly tinned tip creates a more effective thermal bridge between the iron and the joint.
Clean and retin the tip
- Bring the iron to a working setting suitable for the solder and equipment.
- Wipe the tip briefly on brass tip-cleaning wool or an appropriate damp sponge.
- Immediately apply fresh solder so it coats the active faces of the tip.
- Remove excess solder while leaving a thin protective coating.
If the solder still retracts into isolated droplets and leaves the tip black, repeat a gentle cleaning and tinning cycle. A compatible tip-tinning compound may help with stubborn oxidation when used according to its directions.
Do not routinely file or sand a plated soldering tip. Aggressive abrasion can remove its protective plating and expose the underlying copper. Once the plating is breached, the tip may erode quickly and become difficult to tin. A severely pitted, cracked, or persistently unwettable tip usually needs replacement.
Use enough contact area
A very fine conical tip can struggle to heat a joint because it touches the work over a tiny area. A suitably sized chisel, bevel, or other geometry may transfer heat more effectively while still fitting between nearby parts. Choose the tip according to access, joint geometry, thermal mass, and the capabilities of the iron or handpiece.
If the tip temperature falls sharply on contact with a large terminal, connector, ground plane, or heavy wire, raising the setting is not always the best first response. Check tip size, tip installation, surface cleanliness, and equipment capacity. Excessive temperature can accelerate oxidation while leaving the underlying heat-transfer problem unresolved.
Clean the Surfaces Being Joined
Fresh-looking metal can carry thin oxide layers or residues that interfere with wetting. Finger oils, adhesive, machining lubricant, old flux residue, corrosion, lacquer, and enamel can all keep solder away from the base metal.
Disconnect power and clean the work using a method compatible with the component and substrate. Suitable preparation may include:
- Removing grease or residue with an appropriate electronics-safe cleaner.
- Stripping enamel from magnet wire using a method suited to that enamel type.
- Removing heavy oxidation from a robust bare-metal terminal with controlled mechanical cleaning.
- Applying fresh compatible flux after cleaning.
- Removing old, degraded solder from a repair area before attempting a fresh joint.
Mechanical cleaning requires restraint on PCBs, plated terminals, and delicate component leads. Scraping can remove thin plating, cut traces, or lift a pad. If a PCB pad changes shape, moves, wrinkles, or separates from the board, stop applying heat and inspect the damage.
Use Flux That Matches the Work
Flux removes or disrupts surface oxides and helps protect heated metal from rapid reoxidation. Flux-cored solder provides flux during normal use, but the small amount inside the wire may be insufficient for an old terminal, tarnished wire, or reworked PCB joint.
Apply a modest amount of flux that is compatible with the solder, base metal, board, and cleaning process. Rosin-based and other electronics fluxes are commonly used for electronic assemblies. Some flux residues may remain under specified conditions, while others should be cleaned. Follow the applicable product guidance rather than treating every flux chemistry the same way.
Avoid plumbing acid flux on electronic boards and wiring. Its aggressive chemistry and residues can cause corrosion and reliability problems. Difficult metals may require specialized flux, but a flux intended for fabrication or plumbing can be unsuitable around electronic components.
Flux also has a limited active period under heat. If it has smoked away, darkened heavily, or become crusty before the solder flows, remove the residue where appropriate and apply fresh flux. Continuing to cook spent flux rarely improves wetting.
Heat the Joint, Then Feed Solder to It
Melting a ball of solder onto the iron and wiping it onto a cold connection often produces a blob that rests on the surface. The joint itself must become hot enough for the solder to flow across both parts.
- Place the tinned tip so it contacts both surfaces being joined, such as a component lead and PCB pad.
- Use a small amount of solder on the tip as a thermal bridge if needed.
- Feed solder at the junction between the work and the tip, or directly to the heated joint.
- Watch for the solder to spread onto both surfaces.
- Remove the solder wire, then remove the iron without disturbing the joint while it solidifies.
If the solder melts only when it touches the iron and remains solid against the work, heat is not reaching the joint effectively. Reposition the tip for broader contact, use a more suitable tip geometry, or reassess whether the iron can handle the joint’s thermal demand.
A temperature setting must account for the solder alloy, tip geometry, joint mass, copper area, station behavior, and component sensitivity. Small temperature adjustments may help after preparation and thermal contact have been checked. Repeatedly increasing the setting can damage a board or component without correcting contamination or material incompatibility.
Confirm That the Material Is Solderable
Common electronics solder readily wets clean copper, suitably plated component leads, and many tinned terminals with an appropriate flux. Other materials present greater difficulty or resist ordinary electronics solder altogether.
- Aluminum: Its oxide layer forms rapidly. Specialized alloys, fluxes, and procedures are commonly required.
- Stainless steel: It generally needs surface preparation and a flux formulated for the material. Residue control is especially relevant.
- Nickel and some plated finishes: Solderability varies with the finish, oxidation, contamination, and chosen flux.
- Chrome-plated surfaces: The outer finish may be difficult or unsuitable to solder directly.
- Enamel-coated wire: Solder cannot wet the conductor until the insulating coating is removed or processed by a suitable method.
- PCB solder mask: This coating intentionally resists solder. Solder should wet the exposed pad, not the surrounding mask.
- Severely corroded wire: Oxidation may extend beneath the insulation, making a dependable soldered connection difficult.
If solder consistently beads after cleaning, fresh flux, and adequate heating, verify the base material and its finish. A crimp, mechanical fastener, welding process, or purpose-made connector may be more appropriate for a material that is difficult to solder.
Problems Specific to PCB Rework
Old solder on a PCB can contain depleted flux and surface oxides. Adding fresh flux and a small amount of fresh solder may improve heat transfer and help the existing alloy flow. For badly contaminated joints, remove the old solder with suitable desoldering equipment, clean the area, and rebuild the connection.
Repeated heating can weaken the adhesive holding copper pads and traces to the board. Stop and reassess if:
- A pad moves with the component lead.
- The board surface blisters or changes texture.
- A trace begins to peel.
- A component body or nearby plastic starts to discolor or deform.
- The solder mask chars.
- The connection still will not wet after cleaning, fluxing, and improving tip contact.
A missing or lifted pad cannot be repaired by adding a larger solder blob. The electrical path and mechanical support must be evaluated before further work.
How to Tell Whether the Correction Worked
A corrected joint should show solder wetted onto each intended metal surface, with no obvious gap between the solder and the parts. The component lead, wire, or terminal should remain stable after cooling. Rounded beads, receding edges, cracks, bridges, and solder that moves independently of the base metal are warning signs.
Brightness is an unreliable universal test because appearance varies with alloy and process. Visual inspection can reveal poor wetting and physical damage, but it cannot establish every aspect of electrical and mechanical integrity. Where appropriate, inspect under magnification and perform electrical checks suited to the circuit after power has been safely restored.
Work with ventilation appropriate to the flux and workspace, keep the iron in a stable stand, and avoid contact with molten solder and hot metal. Flux fumes are process fumes rather than evidence that lead is boiling from ordinary soldering. After handling lead-containing solder, wash your hands before eating, drinking, or touching your face.

- Jesse
Jesse is the editor behind Soldering Gear, where he covers soldering irons, stations, rework equipment, and the tools that belong on a practical electronics bench. His work focuses on comparing product specifications, features, compatibility, and intended uses so readers can make more informed buying decisions.
- Best Soldering Iron for SMD: 9 Picks in 2026 October 15, 2026
- Best Hot Air Rework Station for SMD: 9 Picks in 2026 October 14, 2026
- What Tools Do You Need for Soldering Electronics? October 13, 2026
- Best USB-C Soldering Iron: 9 Picks in 2026 October 12, 2026
- How to Choose Solder for Electronics October 11, 2026