How to Tin a Soldering Iron Tip

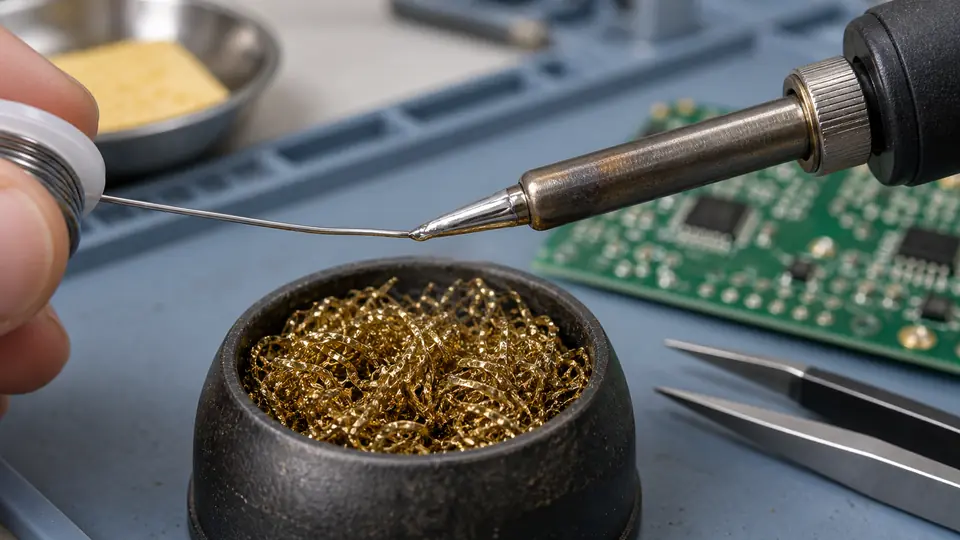
Tinning a soldering iron tip means covering its working surface with a thin layer of solder. This layer limits oxidation and improves thermal contact between the tip and the work. A properly tinned tip transfers heat readily, while a dry or oxidized tip tends to repel solder and heat joints slowly.
The basic process is simple: heat the iron, clean the tip gently, apply fresh solder across the working faces, and leave a continuous coating on the surface. Timing matters. Once a hot tip has been cleaned, apply solder promptly so the exposed plating does not begin oxidizing again.
What You Need
- A soldering iron or temperature-controlled station with a compatible tip
- Electronics solder containing flux, or compatible solder and electronics flux used separately
- Brass tip-cleaning wool or a slightly damp cellulose sponge
- A stable iron stand
- Tip-tinning compound for stubborn oxidation, if needed
Use flux intended for electronics and suitable for the materials being soldered. Plumbing flux and other highly active acid fluxes can damage electronic assemblies and soldering equipment through corrosive residue.
Keep the hot iron in its stand whenever it is out of your hand. Avoid touching the tip, molten solder, and nearby heated metal. Suitable ventilation helps manage fumes produced by heated flux and process materials. If using lead-containing solder, keep food and drinks away from the bench and wash your hands after handling it.
How to Tin a Soldering Iron Tip
-
Inspect the tip while it is cold. Confirm that it is seated correctly and compatible with the iron or handpiece. Look for loose scale, heavy black oxidation, pits, cracks, or exposed base metal. A severely damaged plated tip may require replacement rather than cleaning.
-
Heat the iron to an appropriate working temperature. Use a setting suitable for the solder alloy and equipment. The solder should melt readily on contact with the heated working surface. Excessive temperature accelerates oxidation and can burn away flux before it has time to help the solder wet the tip.
-
Clean the hot tip gently. Wipe it briefly through brass wool, or pass it across a slightly damp cellulose sponge. The goal is to remove old flux residue and loose oxidation without grinding the plated surface. Avoid repeated wiping, heavy pressure, or prolonged contact with a wet sponge.
-
Apply fresh solder immediately. Touch solder to the working faces of the tip rather than melting it farther up the heater or barrel. Move the solder around the usable surfaces so the molten alloy spreads over them. Rotate the iron as needed to reach both sides of a chisel, bevel, hoof, or conical tip.
-
Leave a thin, continuous coating. Remove a large hanging drop with one light pass through brass wool if necessary, then apply a small amount of fresh solder again. The finished coating should cover the working surface without leaving a heavy blob that could drip.
A successfully tinned tip holds a continuous molten solder film over its working area. Bare dark patches or solder that pulls into isolated beads suggest contamination, oxidation, inadequate heat, depleted flux, or damaged plating. Color and reflectivity vary with the alloy, so brightness by itself is a poor test.
Tinning a Brand-New Tip
A new plated tip should be tinned during its first heating cycle. Fit the tip according to the equipment instructions, place the iron in its stand, and have solder ready before applying power. As the tip becomes hot enough to melt solder, feed solder over the working surfaces until they are coated.
This early coating reduces the time that clean, hot plating remains exposed to air. Do not allow a new tip to sit at operating temperature for an extended period before applying solder.
Some stations require particular tip installation or cartridge handling procedures. Follow the equipment manufacturer’s instructions, especially for cartridge tips, temperature-sensing tips, and systems that must be powered down before a tip is changed.
What to Do If Solder Will Not Stick
If solder beads up or falls from the tip, check the simplest causes first. Repeatedly raising the temperature is rarely the best first response and may make oxidation worse.
Confirm that the tip is actually heating
Fresh solder should melt when touched to an active portion of the tip. If it does not, check the station setting, sleep mode, tip installation, electrical connections, and equipment status. A loose or incompatible tip may heat poorly despite a normal display reading.
Clean once, then apply fresh solder promptly
Use brass wool or a suitable sponge for a brief cleaning pass. Apply solder immediately afterward. Waiting leaves the cleaned metal exposed at high temperature, allowing another oxide layer to form.
Rosin-core or another electronics-grade flux-cored solder often provides enough flux for ordinary tinning. For a reluctant but intact tip, a small amount of compatible electronics flux may improve wetting.
Reduce excessive temperature
A tip that blackens quickly, produces burned residue, or loses its solder coating soon after cleaning may be running too hot. Lower the setting to one that still melts and flows the chosen solder effectively. Tip geometry, station behavior, solder alloy, and the thermal demand of the later joint all affect a suitable setting.
Use tip-tinning compound for stubborn oxidation
Tip tinner combines materials that help remove surface oxidation and restore a solder coating. Heat the tip, press or roll the working surface lightly in the compound as directed by its manufacturer, then wipe away loosened residue and apply fresh solder.
Tip tinner is a restoration aid rather than a substitute for routine care. Confirm that the compound is compatible with the tip and soldering process. Stop if repeated attempts fail, since prolonged heating and aggressive treatment can further damage the plating.
Replace a tip with failed plating
Modern soldering tips commonly have a copper core protected by iron plating and additional surface treatments. Once the protective plating is cracked, deeply pitted, or worn through, solder may wet irregularly and the underlying copper can dissolve into molten solder over time.
Do not file, sand, or aggressively scrape a plated tip. Abrasion can remove the protective layer and turn a recoverable surface problem into permanent damage. Some traditional solid-copper tips can be reshaped and reconditioned, but that practice should be limited to tips specifically identified as solid copper and maintained according to their manufacturer’s guidance.
Keeping the Tip Tinned During Work
The solder coating should be renewed throughout a soldering session. Clean the tip when residue interferes with wetting, then add fresh solder before touching the joint. Cleaning after every joint is usually unnecessary and may shorten tip life if it becomes constant, forceful wiping.
A small amount of molten solder on the tip can improve initial thermal contact with a lead, pad, terminal, or wire. It fills microscopic air gaps between the surfaces. That small bridge is used for heat transfer. The solder needed to form the connection should generally be fed at the heated joint so its flux reaches the bonding surfaces.
Tip shape affects how well the tinned surface contacts the work. A chisel or bevel with adequate contact area may transfer heat more effectively than a very fine conical tip, including on many compact joints. Choose a compatible geometry that reaches the joint without touching nearby components and that matches its thermal demand.
Tinning the Tip Before Shutdown
Before switching off the iron, clean away contaminated residue and apply a generous fresh coating of solder to the working surface. Place the iron securely in its stand and turn off the equipment. Leave the solder coating on the tip as it cools.
This storage layer shields the plated surface from air during cooling and while the iron is unused. At the next session, heat the iron, remove the old coating with a gentle wipe, and apply fresh solder before beginning work.
If changing between lead-containing and lead-free processes, consider contamination requirements for the project and workplace. A separate tip or carefully controlled cleaning procedure may be appropriate where alloy mixing is restricted. Tinning preserves the tip, but it does not guarantee that all traces of a previous alloy have been removed.

- Jesse
Jesse is the editor behind Soldering Gear, where he covers soldering irons, stations, rework equipment, and the tools that belong on a practical electronics bench. His work focuses on comparing product specifications, features, compatibility, and intended uses so readers can make more informed buying decisions.
- Best Soldering Iron for SMD: 9 Picks in 2026 October 15, 2026
- Best Hot Air Rework Station for SMD: 9 Picks in 2026 October 14, 2026
- What Tools Do You Need for Soldering Electronics? October 13, 2026
- Best USB-C Soldering Iron: 9 Picks in 2026 October 12, 2026
- How to Choose Solder for Electronics October 11, 2026